

OPS M.I.A
Tips
- Only certain enemies attack the target.
- While it’s not apparent, you’re on a deadline. This is because after you clear out the first area, he will hide behind a car in the second. The AI doesn’t do much damage to the car, though they will blow it up if enough enemies try to kill him.
- Rule of thumb, generally only camo enemies shoot you. There are some exceptions, but most of your targets are wearing camo.
Guide
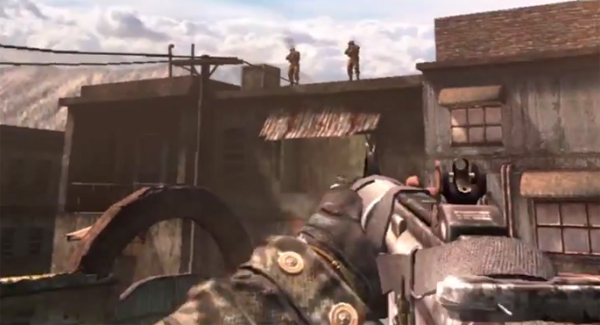
- Pick off everyone and then look at the building door. 2 more enemies will come out, the first one will shoot at the target and the second will attack you. Make sure to plan ahead.
- In the next area you’re ambushed by 4 enemies. One will run to the middle, one is a little behind him at the top left, one is to the right of that guy and the final one is shooting on the balcony. You need to pretty much kill the first 2 instantly, shoot the third and get the forth while he’s running. If he makes it to the other side, he will shoot you through the window. He is killable, just harder to see / hit.
- Okay, this is where the shit hits the fan.
- Pick off the guy shooting at you and then look at the doorway. Two enemies will come out and have the same pattern as the previous couple. Kill them and then look up. 2 suited enemies will come out, so dispatch them. Once they’re down INSTANTLY look at the balcony next to it (right side) and look up. 2 enemies will pop out and they’re the most important people to kill, since they attack you and will make everything harder. Finally after killing them, look to the open building to the right and kill the 2 suited guys. The last bit is clean up, though it’s not hard unless you took too much time.
- At this point a truck will come, though it has like 4 enemies. 2 come behind, 2 from the front, just don’t let them do too much.
- This is the end, so don’t screw up! 2 suited enemies will appear to your right and shoot the target. Kill them to complete the mission.
Escort Service
- In the first room the game starts by pretty much telling you… this mission isn’t going to be fun. 4 people will spawn, which MUST be killed within a few seconds. Failing to do so will result in a grenade killing you or you can piss your life away trying to toss it back. I just found it easier to kill the guys.
- To the right 3 waves of 3 – 4 enemies will spawn. Just pick them off and TRY to prevent them from dropping grenades (you want the cars intacted below).
- Once they’re dead you need to progress, though you will see a guy run away and another run towards you. Try to kill them both and then enter the next room. In here you will see a guy waiting near some broken glass, so try to kill him. Before exiting you need to pick up the sniper rifle.

- This next area is 100% about… lets call it “pretend aiming”. The gist is that you need to predict where your enemy and cross hairs are, then fire. The enemies are from left to right… Top, Middle, Middle, Top, Top, Top. You must kill the enemies in this order or you should / will die. You can try to make it to the sniper spot, though I found that place impossible to get to on hard.
- Take a breather since enemies won’t spawn till you move to the middle below. Okay so here comes the single most important part of the WHOLE MISSION.
- Run down the stairs and pick up the turret. While you can use the turret to easily beat this part… it’s better saved till later. Run to the middle and that will spawn some enemies. They spawn from 2 locations, from where you enter and under the stairs. Each of these locations have roughly 4 waves, many of which are filled with enemies that will rush you. HOWEVER, another wave won’t spawn till every enemy is killed, so plan your attacks (basically focus on one set before the other).
- If you magically beat this area (it’s hard without the turret), you need to go down the hallway. Naturally an enemy is waiting for you, so kill him. Continue down this path till you see a room.
- Quickly run in and out of the room, so the enemies will spawn. Roughly 6 enemies will spawn and usually 1 will rush you. Slowly pick them off, then get ready to actually enter the room.
- When you run to the middle 3 more enemies will spawn. 1 will spawn behind the middle car and the other 2 will run from the back. These guys are pretty easy to kill, so don’t worry about them.
- Move straight to the back (you will see a door) and then turn to the right. You should see another door, which is where you need to go. Move forward, but you want to hang out next to the wall in the middle (there will be some boxes next to it and it’s to the left of the middle car). 2 enemies will spawn in front of you and another 4 or so will rush you. This spot will give you a leg up, so don’t move till the objective tells you to go to the door.
- YAY time for a breach, just shoot the 3 dudes and smile cause it’s almost over. The target will go to the first door mentioned above, but be warned an enemy will open the door while opening fire on you. Kill him and enter the next area.
- Now you’ll see another turret and an exit. This exit will take you to the place where you found the first turret, so expect a swarm. Simply set up the turret in an open place and it will kill every enemy (if done right). Over time it will run out of ammo and blow up. Now if you managed to keep the other turret like I told you to, drop it in the same spot or wherever the enemies will let you. I advise doing this a little before your turret dies, since you will have cover fire. If you do this correctly, the guy you saved will run out and the mission will end.
Final Mission
This is actually pretty straightforward. I beat it on my first try without using any grenades or fancy tactic. There are only 2 bosses, so just slowly advance and you should be fine.
[Editors Note: Sorry for the long explanations and serious lack of pictures. Declassified disables the ability to take in game screenshots, so this is the best I could do.]