

I’m sure you’ve heard the expression “Don’t judge a book by its cover”, but many gamers do just this. Naturally when a trophy list is leaked, many people start to judge the games’ difficulty. Several gamers thought Lost Planet 2’s hardest trophy was play 300 chapters, but it turned out those titles were quite insane. This is one of many games where the appearance was quite deceiving and it got me thinking what other games have surprisingly hard tasks. This of course led to my five most surprising or “troll” trophies out there.
“High Score” – Streets of Rage 2

When Sega started to release ports of classic games, people thought they would be a slam dunk. Who could blame them, the Sega Classic Collection is among the “easiest” platinums out there. Each singular game varied in difficulty, but none of them were exactly shocking. Some even had huge margins of error. If you played Altered Beast getting the high scores would happen even if you died 1,000 times, so why would Streets of Rage 2 be different? Trust me, it’s a complete 180 from other Sega classic trophies.
For starters, you had to play on “Hardcore” which lowered your life count to 1. You could gain more, but the margin of error is already extremely low. Next to hit the required 800,000 you had to play alone. It is simply impossible to do it with another person. Finally this amount happens on or around the last stage. This should require you to do the elevator sequence, which is in a word hell. Thankfully, you could exploit the save state, but you could be looking at 300 – 500 reloads before finishing the game. Another thing to keep in mind is that a few Xbox users said they didn’t hit 800,000 even after beating the game.
“Pro Vamp” – Bloodrayne Betrayal

Why someone thought of rebooting Bloodrayne will never make sense to me, but thankfully Betrayal was a pretty cool game. On your first attempt, it is extremely likely you got a failure rating on every stage. Now it makes total sense that to get “Dhampir” rank you had to beat the stage without dying, but its far more. To actually pull off this task you’re required to rush the stage, take minimal to no damage and collect most collectables. Some of the best scores on these stages gave you a margin of error of roughly 5,000 points. This is something like 5% margin of error, no deaths, while playing extremely fast. Talk about unrealistic standards.
“Score!” – BlazBlue: Continuum Shift

Many people say BlazBlue CT was easy for a fighting game, but the hardest without trials. This was due to unlimited Ragna in score attack mode. If you never fought him, well he could regenerate his life by attacking you and he was a combo fiend. Messing up once could result in him getting back 50% of his life! Plus you’re basically dead at this point, so it wasn’t fun. Thankfully you could endlessly retry by fighting player 2.
When CS came out people thought Ragna would cause some déjà vu. During score attack mode, you will hit the “unlimited” mark. This is a point where all the fighters were in their unlimited forms. It starts with Alucard who is a hard fight, although hardly an extreme challenge. The real problems come from Hakumen. Basically he is extremely useful if you have the magatama (it’s a meter like regulation system.) to use his attacks. Unlimited Hakumen does FAR more damage and basically has an unlimited amount of magatamas. The challenge comes from controlling the fight just enough to win. You see if you beat him too bad, he will obtain several magatama which will allow him to fight back. Usually he will OUT OF NOWEHRE attempt to counter you. Attacking him at this point is basically a death sentence. I believe I lost all my health after he countered me then attacked me in the air a few times – truly it’s a devastatingly powerful attack. Transversely if you don’t hold him back, then he will get in some deadly combos.
If you managed to win this fight, the horrors weren’t over. The next fight was against Hazama. This is a unique form because he gained a field around him. This field would drain your life, while regenerating his own. Naturally you have to beat him while this constant give/take is in effect. He was far easier than Hakumen, but unlike the original score attack mode you couldn’t rely on player 2. On a high note, Unlimited Ragna got a serious nerf, although they definitely blew people away with those changes.
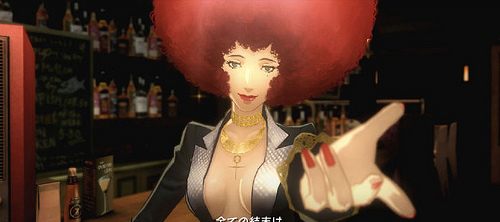
“A God is Born!” – Catherine

Catherine in general discouraged many gamers, but Axis Mundi is so hard you actually get with a goddess for finishing it. Unlike the earlier Babel stages, Axis relied on unmovable boxes and broken boxes. This made doing anything extremely annoying. Furthermore, there apparently is an “easy” build that’s extremely rare. Most people with US copies believe it was removed from the US version. I don’t know if that’s still the case, but beating it alone feels like an impossible task. It’s really hard to explain the mode, but you will mostly end up with a huge singular line. This will ultimately end with the ground falling out from under you. Most were virtually forced to play multiplayer over how unrealistic the task was.
“Tactical Challenger” – Vanquish

Recently, a few games have had enemy rush (hoard) modes, but Vanquish got it right. The point of the Tactical Challenges was to put you in an extremely tight spot, but give you many options to win. Early on, I tried these before story and lost on wave four in challenge one. After beating the story on hard, I revisited these challenges. This time around, I beat the first three in minimal tries. If I lost, it was mostly due to an unexpected enemy/situation. Once I understood what to do they were doable. The same was true for mission five, but four was another story. It was completely different as you were given limited space to move. This made the final fight against Crystal Viper scary. For those who never played Crystal Viper was a boss that could transform his arm into a sword and would turn invisible to attack you. He was mostly about listening for footsteps, then blowing him away. Considering the space, you would often run into him followed by a depressing death.
After beating challenge four you may cheer, but if you had read online there was a secret final challenge. The final challenge was known simply as “Tactical Challenge Six” and was leagues harder than challenge four. This challenge starts with Crystal Viper almost vindictively looking for revenge, but he also brought several low tier enemies. Beating him brought a Bogey (who made challenge one a challenge), plus several low tier enemies/flying robots . Again for those that didn’t play Bogey’s could throw tons of grenades, overheat your suit (removing slow mo for a period), fired locked on lasers for like six seconds and had a deadly charged shot. Mind you, he could also fly around attacking you from any angle. The next wave featured mostly heavy robots that could easily get the best of you. They’re not the most deadly, but definitely no joke.
The fourth wave featured ball enemies (only killable when they open unless you use the LFE gun or the rocket I think), several blue low tier enemies (slightly more deadly than the earlier ones), two flying turrets which could kill you like nothing and two scorpions. For those that didn’t play the scorpions could transform between a humanoid form and a scorpion form. They had high lives, could spawn mini turrets and do critical damage. Winning this wave would bring you to the end where things just feel like hell. In wave five there are nine ball enemies which MUST nearly instantly get destroyed if you want any chance of winning. From here the final fight is against two Bogey’s which are extremely difficult to keep track of. All it takes is the wrong attack hitting you, pressing your luck or paying too much attention to one of them. This is a task so few people have accomplished that only 1,666 gamers are listed on the leaderboard.
So what game do you think blew you the away the most? Have you completed any of the tasks listed above? Tell us below!
[Editors Note: Lost Planet 2 wasn’t listed because it was used in my last list.]
Nik
January 16, 2012 at 12:32 PMIve only touched that last one and my goodness it is impossible. I dont think i got past the first wave on the final. Just remember that i took out the tank and flying and rolling things come at you from all directions. Gave up after that, there is simply no hiding. If only there was a way to prolong the bullet time or for cover to actually help
Grant Gaines (大将)
January 16, 2012 at 4:11 PMI strongly suggest using EMP’s. They 1 hit the flying enemies unless they transform. Now the tank is actually an extremely easy enemy IF you understand that it only has a few places to attack you. Once you take them out the tank can’t do shit to you. This is extremely easy after a few tries, but can feel impossible.
This being said I think you’re confusing mission 4 with 6. If I recall correctly Mission 4 Wave 4 has the stuff you’re talking about and this is a lot easier than Mission 6. Additionally the hardest part of mission 4 was the last wave due to the limited space. I do strongly suggest you keep trying as I can confirm it can be done. (I infact did it too)
Nik
January 16, 2012 at 10:13 PMNo no, after much toiling i got the 4th done (assuming it’s the one in the forest??) like, 1-5 all done. The one labelled as final, my EMPs never manage to take out all the flying things, ive tried to do it like others have displayed on YouTube but i have since moved on. That trophy, seriously not for the faint of heart.
And yah, tank was easy, shotty to the bum. That’s all i remember taking out in that challenge
Grant Gaines (大将)
January 17, 2012 at 5:53 AMYes the forest is #4 and are you talking Challenge 6 Wave 2 then? It’s the one where the bogey spawns in the middle with some red/orange robots, but shortly after some flying enemies appear too. If this is the spot you’re talking about then it’s actually pretty easy. (not meant to sound insulting) Most likely Crystal Viper will be your final enemy in the first wave. Since hes pretty easy to control you want to stand by the statue. Kill him then chill till the next wave appears. Bogey will appear first, though you can easily ignore him. The robot peons will appear in two corners. If you throw a grenade when the warp hits max size (it will keep growing, but at some point it won’t grow anymore. This means they’re about to spawn)it should kill all the peons. If not it will be enough for you to be “safe” or safe enough. If you’re lucky the bogey will ALSO get nailed doing serious damage (20 – 30%) followed by leaving you alone. This is the tricky part… You M U S T change to the EMP grenades. Both of the flying enemies will spawn behind you… this means you’re going to die in seconds upon failing. The important thing here is that if you throw an EMP at the ground it SHOULD kill all of them. If you fail throw another or yet another if required. This should leave you just the Bogey plus a few peon robots.
Additionally I understand how you feel. I gave up on this task like a year+ ago because I got sick of the two bogeys killing me at the end. However I always thought I could do it so it was constantly on my mind each time I looked at my disc. Naturally if you’re up to the challenge again this method should work no problem. If not then I totally understand cause that mission is a nightmare…