
One common debate I see is whether or not Enter the Gungeon/The Binding of Issac are hard. While both games can be extremely difficult, certain builds reduce said difficulty to nothing, often times making it a matter of luck. Similar things can be said about Dead Cells, with the main difference being luck isn’t too important. This might sound crazy at first but it will make sense after reading this guide.
Basic Tips/Advice
Before you do anything, I strongly suggest reading these tips/tricks to ensure the best experience.
- Only unlock weapons that you think are useful. In my experience the best three unlocks are Double Crossb-o-matic, Heavy Turret and Ice Bow and the ideal situation is only unlocking these items. The reason for this choice is that it limits the loot pool. Now, instead of having 10+ items, you might have four, making it infinitely easier to get a specific build.
- Building towards attack will make any difficulty a joke. Even though this will make you a glass cannon, The Hand of the King will go from borderline impossible to an absolute joke. For instance, I did two stem with a more balanced build and had issues killing the elites before The Hand of the King returned to combat, often times making it impossible to win or at least result in me taking some damage. The second I went all in on attack, all the adds died in seconds and The Hand of the King could barely attack.
- Ignore the revive skill. Despite sounding extremely useful, it’s often a better idea to further increase your attack, since this decrease the likelihood of taking damage in the first place.
- Don’t be afraid to ignore enemies. Unless you want cash or cells, there is no real point in fighting enemies. More often than not, you can actually ignore everything, collect every possible enhancement and beat the game in relatively little time.
- Use Alienation to heal. This skill will completely heal you, assuming you have a curse of at least 10, making it far more useful than using your limited potions.
- Abuse ice and certain skills. Ice is, by a wide margin, the most useful debuff in the game. Not only does it stop enemies, giving you a chance to attack, heal or whatever, the thaw leaves them open to devastating attacks. This makes a ton of sense if you watch any of the videos below. Beyond that, try to have as many synergies as possible or build towards what you’re doing. Critical hits on poison, with a poison turret and both having +50% poison damage is far better than a bunch of random sense. As soon as you get the right stuff, stop. That being said, remember that upgrading an item will change the roll, meaning you should upgrade before rolling.
- Figure out the best path for you. I won’t say Sewer, Ramparts, Con Boss, Stilt Village, Clock Tower and then the normal path is the best way to play but I found it much easier than many of the other levels. Unless you want Acceptance, I wouldn’t suggest doing alternate paths on higher difficulties, since they’ll make this harder than you’ll likely want.
Ideal Build
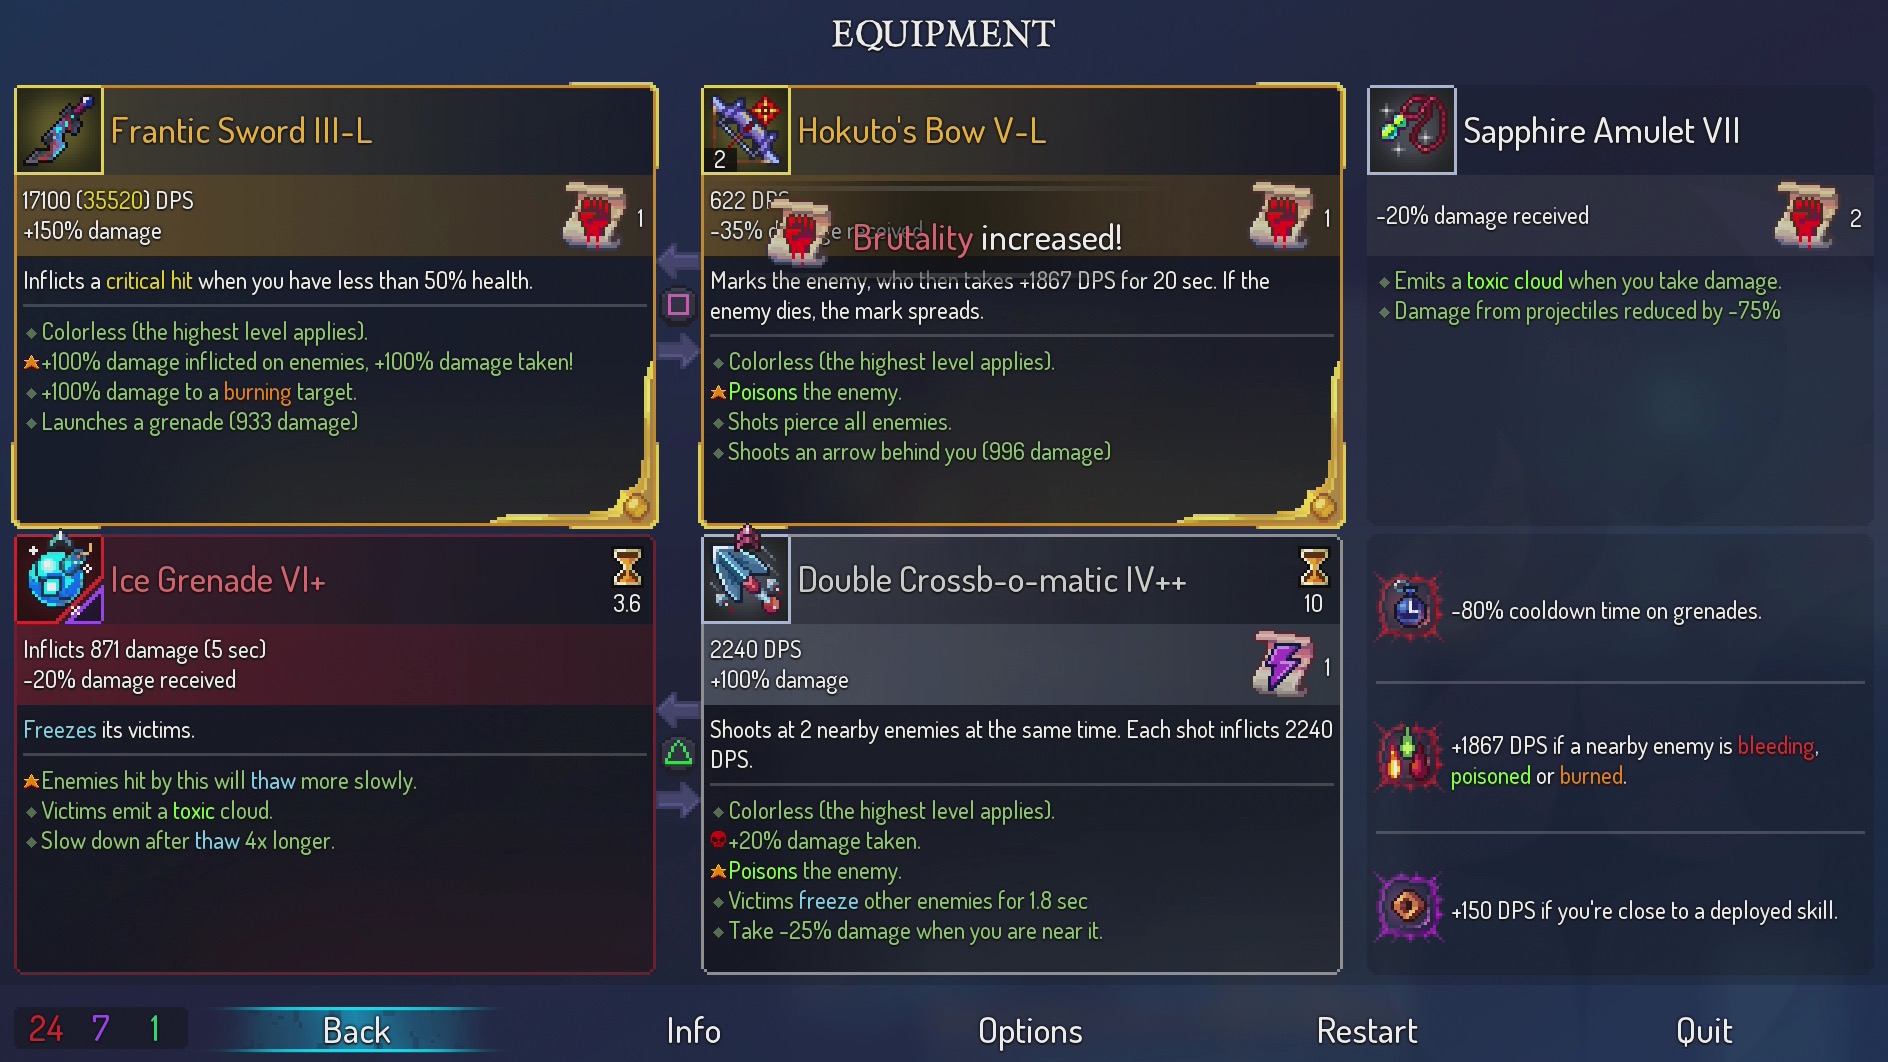
For me, I found the ideal build is as follows:
- Increase tactics whenever possible. When it isn’t possible, go for survival.
- Ice Bow (Undead Archer)
- Heavy Turret (Slasher)
- Double Crossb-o-matic (Zombie)
- Efficiency (Default)
- Support (Inquisitor)
- Ammunition (Default)
- Alienation (Concierge fifth kill)
If you’re having trouble unlocking any of these, I included the monster that drops it to the right. So, unlock the Hunter Grenade, find that enemy and repeat until it drops.
As for why this is the ideal build is simple. Ice Bow can be used quite often and will work well with other tactic based weapons. From there, it seems to have a small pool of skills, making it extremely easy to get a great build and offers damage reduction. From there, Heavy Turret does a lot of damage and tends to stun enemies, with Double Crossb-o-matic attacking often enough to melt enemies. While I wouldn’t say two of either would be bad, don’t swap them out for Sinew Slicer.
Mutations are a lot simpler. Normal levels should be Support, Efficiency and Alienation, with Alienation being swapped for Ammunition during boss fights. The idea is you can now use turrets extremely often, every four or so seconds with maximum reduction, making it absurdly easy to use whenever you want to. Since you’ll always be by them, Efficiency will further increase your power. As mentioned above, Alienation is a fantastic way to heal and Ammunition will give you plenty of chances to freeze bosses.
How to Beat Almost Any Challenge
The best way to handle pretty much any situation is to rush in, shoot an arrow to freeze enemies, throw down both turrets and watch enemies die. When certain enemies are causing a problem, simply throw a turret to distract them and then rush, followed by throwing down both turrets to destroy them. If this is confusing, the video below shows you how it’s done.
Bosses
The same basic concept is true for every boss, except they require a little more situational awareness. The Concierge can be destroyed by simply spamming arrows and keeping him at range. As for The Time Keeper, use the turrets to block throwing attacks and hold her attention. If done correctly, you’ll only need to dodge her throwing attack once and even if you get hit, just freeze her and it will be enough time to break free and avoid her attack. Both of these tactics can be seen below.
The Hand of the King is the same basic concept. Learn his moves, act accordingly and freeze whenever possible, with the adds offering a different challenge. The best course of action is to throw both turrets below, jump to the upper level and freeze both enemies, followed by throwing both turrets as soon as the lower enemies die above. If this is confusing, simply check the video below.